Showing posts with label FCE. Show all posts

Monday, 31 March 2014

Editing

Editing

We are now nearing the end of editing our film opening so I decided to finish some final editing sections to help improve both the quality of the opening and of my editing skills.  

 First of all I had the job to insert a title screen to inform the audience that the opening is now reverting back to a week earlier.  To do this I selected the T tab on the right hand side of final cut and inserted a black screen with the same text font as the named titles.  I chose a black screen rather than a picture in the background to put emphasis on the words and to create a caesura to build the tension.


 I then inserted a clip transition after the "1 week earlier" to create a smooth change before the last section of the opening.  I chose a blur transition because it ran the same time as the church bell sound.
 After reviewing the opening I decided that the second church bell did not sound completely right for the situation.  After listening to the final cut sounds of church bells I found a better noise layered it in.  After watching it a few times I decided to take off the increased speed of the girl turning around so it was back to normal pace.


We needed something to trigger the girl to turn around.  So to continue the story line we added in diegetic sounds  to make it seem as though she was being followed by the priest who is to exorcise her.
After listening to the sounds available on final cut I inserted male breathing and footsteps to seem as though he is following her.  The a snapping of a twig then triggers her to turn around, I then inserted a clip of the priest's eyes to inform the audience that it is him that is following her.  This looks quite effective as it helps to build up the tension and varies the camera angles.


Monday, 24 February 2014

Editing

Editing


 Alongside editing with the group we have also decided to do individual editing to make sure we all participate equally.  On top of the already existing editing I started with getting rid of any background sound on the clips.  I did this by going onto audio enhancement, sound board, then reduce background noise to 100%.


 I then wanted to add in some diegetic sound to increase the realism of the piece.  For the forest section I went through the already existing sounds on final cut to find a foot step sound.  After testing out all the footstep sounds next to the clip I decided on Footsteps bare running.  I then adjusted the volume of the running on the sound board to make sure they were not too loud and would drown out any other sounds.


 I also found Footsteps Mud run which was very appropriate for parts of the clips so I layered it under the heavy breathing of the victim.  The combination of sounds makes the clip seem very realistic and fits well in conjunction with the running clips.
 To make this ending clip as effective as possible I wanted to find a non-diegetic sound which would make the audience jump.  After testing a lot of the sounds I decided on a thunder noise as it sounded very ominous and dramatic, in parallel to the scene and genre.


 I also wanted to increase the brightness of some of the clips to make sure the audience can see the possession scene properly.  To do this I went onto the colour board then exposure.  I only increased the brightness by a little bit to make sure it was still shadowy and dark.
To make the possession seem more supernatural and creepy I decided to make the clip run backwards to make the movements more unnatural and disjointed.  This looked very effective so I used the blade tool to break up the different camera angles then rearranged them so the possession was even more disjointed.


Wednesday, 5 February 2014

Garage location mise-en scene

Garage Location Mise-en Scene

Carrying on from my last blog post on location, we used my garage for our latest day of filming.  It fitted our supernatural horror really well as it was very dirty and dingy.  The bare walls and dark colours made the scene look very effective and scary.  
 To fit with the religious, exorcism theme we used burnt down candles to mimic candles used in churches and exorcism scenes from other films.
 The costumes for the scene was a priest's outfit and the young girl victim.  For the priest we used a plain black suit and priests front and dog collar.  This looked very effective and realistic which made the scene look very realistic for an exorcism.
 We chose a position in the garage which would look the best on film of the background.  The wooden and metal brown wall looked the best as it was dirty and broken in places to make it look run down and unused.  We organised the candles into a semi circle around our victim to mimic a ritual like situation which looked very effective for the genre.


We then tested the lighting by switching off the over head lights.  Through the
camera the candle lighting lit up the victim very effectively as the low lighting
was very specific for the genre.


In evaluation I feel that the mise-en scene was very effective for the supernatural horror genre and fitted our exorcism theme very well.  The candles worked well as low-lighting and gave a religious feel to the scene.  The costumes looked very realistic which is good for the scene as horror is usually more effective at being scary by using realism.

Sunday, 19 January 2014

Editing Practice

Editing Practice

When we filmed our first scene in the church location, we were unable to film at the best lighting time.  This resulted in a brighter light than we had wanted so we would have to make it look darker in the editing process.  So to prepare for the final editing I imported some of the church shots into final cut pro and went onto the colour panel.

In order to make the shot seem darker I experimented with the toning.  I made the shadows darker which created silhouettes of the trees and bushes.  I also made the mid tones and highlights darker to change the general colouring of the shots. 
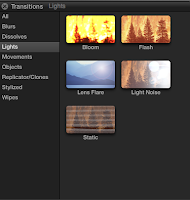


I then imported some of the woods shots.  As we filmed these in the dark using torches to create an interesting effect, I found that we had to increase the brightness so you can see more of the scene.


By moving the shadows, mid tones and highlights up on the exposure part of the colour panel the picture brightness increased and more could be seen.  


In conclusion I feel that the church scene editing went better than the woods scene.  Decreasing the exposure was much more effective than increasing it.  More work will have to be done on the woods scene to increase the quality, maybe a night vision effect would make it more interesting with the torch light.

Sunday, 12 January 2014

Evaluation Filming day 2

Evaluation of Filming Day 2

  • Our second filming day was for the woods scene at the end of the opening the whole group was present for this section.
  • We began filming at half past 5 because we needed the dark for the torch light to look effective.  The location was danson park and we found an appropriate wooded path to use.
  • Our actor was again our victim and she was wearing the same nightgown costume but this time with possessed style makeup and hair done by Rebecca.

  • This filming took longer than the last day as we needed more shots. The lighting took a while as the torches had to be precisely placed for the victim to show up properly but to also look sufficiently creepy. 


  • We eventually realised that the best lighting we could get was when we positioned the torches just behind the camera to light up what was in front of it.


  • Our shots consisted of a combination of long shots, mid-shots, close-ups and floor shots.
  • To achieve an effective shot of the victim running we put the camera on the floor to get her feet and then put the camera in a boot so it was tilted upwards to get her jumping over the camera.  
  • The only difficulties we encountered was the weather and the background light from the main road.  As it was a very cold night we had to keep putting a blanket and coat over our actor as she was only wearing a night gown.  This was especially bad when she was lying on the floor in the mud.  To avoid seeing the lights from the main road we always had to film the victim with the camera's back to the road.


Evaluation Filming day 1

Evaluation of Filming Day 1

  • Our first filming day was of the church scene at the beginning of the opening although due to work commitments only myself and Rebecca could make it.  We meet at the location at approximately half past 2 and began filming at 3pm.  

  • Our only actor for this section of filming was the main victim, Rebecca's sister.  She wore the nightgown costume with plain pumps and have natural hair and makeup to look as young as possible.
  • The weather was perfect for the scene as it was grey and overcast, making the church look grim and gothic.
  • Using the story board we went through the shots, some we had to re-do as they were not the best quality when we looked at them.  
  • The day went really well and the shots we got are very effective and look how we want them to.  The only problems we encountered was that there was some slight rain at the end of the filming which meant we had to keep wiping down the camera.
      

Sunday, 5 January 2014

Victim Costume

Victim Costume

The last costume ideas for the victim in our film opening were a good starting point for the final product.  We want to portray our victim as innocent and young.  This is because the stereotype for the main, female victim in horror films are usually young, innocent and pure.  So after looking at other horror films for inspiration I decided on a simple, white nightgown from Primark with a light pink floral pattern to make it more feminine.  

So after looking at other horror films for inspiration I decided on a simple, white nightgown from Primark with a light pink floral pattern to make it more feminine.  I then put the dress on some muddy ground and stamped down onto it and rubbed it against outside dirty walls to give it a more grunge look.  This will give the effect that the victim has gone through some sort of physical trauma, or in this case, like she has been running away.

As the opening goes on I will make the costume more dirty as the girl gets more panicked and more possessed.

Wednesday, 18 December 2013

Editing Practice

Editing Practice

As a group we have practiced using iMovie to edit our pre-lim, which we found quite easy.  Although we have found out recently that finalcut editing software is much better to use because it has many more settings and gives a more professional outcome.  So before we use finalcut to edit our real film opening, I wanted to practice using it to get a feel for the software.  

 Once I had imported the first clip I realised that it was too dark so I went onto the side bar for colouring.  First I put up the exposure and then decreased the saturation lightly to create a darker tone for the horror genre.   I also wanted there to be no background noise so I went on the audio option and made background noise removal 100%.


I wanted to add some slightly sinister background noise to the clip so I went onto music and sound and eventually found an appropriate sound called Bass FX D3. .After editing the size of the clip using the blade tool the clip was an appropriate length, was visible and had effective sound. 


I then wanted to practice creating a flashback for our film opening.  So using the transitions side tab I picked the flash transition.  This looked effective as a conventional flashback.  I then layered some audio beneath it of a flash.  I also merged the two audios so the cut between them as not too harsh. 
I then imported the second clip and dragged it onto the timeline. Then using the blade tool I cut it down to the length I wanted it.  Next I experimented with multiple audios to find a "Cardboard box packing" sound which simulated normal movement in a home, then a gasp and boom when the camera went up to the ceiling.  After listening I saw this was not enough sound and so I layered another metal and glass crashing onto the clip.

                                                                              After importing and cutting down the last clip I added audio of a woman's heavy breathing to make the POV shot more realistic.  I also put in running footsteps audio to increase the realism. At this point I also put in walking footsteps into the first clip to match.  Then to end on a scary tone I put in thunder audio to give the shot an ominous feel.


To evaluate I think that the editing process went quite smoothly and I enjoyed experimenting with all the different audios.  I came across some technical problems because I am not very experienced in using finalcut but these problems will go in time.  One downfall of this practice is when I had saved and uploaded the video, the sound was not as loud as it was on the software.  I will have to look at this when we come to editing our final piece as not all the layers can be heard.

Sunday, 15 December 2013

Lighting Checks

Lighting Checks

Before we begin filming, we need to know what time of day we will be filming at at each location.  As sunset was at 3:50 on my practice day, I needed to film around this time as too much before would be too light and compromise the scary aspect and too much after would be too dark.


The first video is a clip of the church location we are using.  The time of this clip is 3:35pm, which I feel is an appropriate time for filming this section as there is still plenty of light for the audience to see the gothic aspects of the church and to see the priest clearly.  Although the lighting is not dark enough to give off a scary atmosphere, we can always use filters in the editing process to rectify this.

The second video is of the alley way we wish to use.  The time here was 3:45pm and is obviously a little bit darker than before.  This is appropriate because the alley way scene comes after the church scene.  Alley ways are also quite enclosed and eerie so the darker lighting is in parallel to that.


The final clip is of the woods location.  This was filmed at 4pm which may be a little late as the clip is very dark so not a lot of high quality film would be captured.  Although we wanted to use torches and strobe lighting to create  shadowy low-lighting so it would have to be dark for that to work effectively.

In conclusion I think that the time between 3:30pm and 4pm is the optimum time for our film opening.  The church scene may have to be filmed at a slightly later time than I have used and once we have experimented with the torches we can decide when the best time for the woods scene would be.

Thursday, 12 December 2013

Production Company Research 2

Production Company Research 2

For our film opening we want to include a large, already exsisting production company to make our opening more professional.  I have taken some examples from my last production research post to help decide whihc company would be most appropriate for our opening.


I feel that the most appropriate production comapny logo for our film opening would be Blumhouse Productions because the company is dedicated to producing horror films so it would be most genre specific for our opening.  I also really like the colours used in the logo and it is quite dreamlike which ties in with the supernatural side of horror.  My second favourite is Lionsgate as the colours and cogs are quite dark and mysterious which could possibly be used for a supernatural horror.  The least appropriate is Paramount as it is uncommonly used in supernatural horror and is too happy and bright for our genre.

I also wanted to deconstruct and critic some exsisting school made production companies to give us an idea of some good and bad things to use when making our own. 


The first video uses "Warner Sisters" which is a referance to the already exsisting Warner Brothers.  This takes away from the professional aspects of the opening and does not make it look realistic.  The colour scheme is quite boring and the typography looks amateur.  I like the way it fades out in a bright light as it is mysterious and could possibly be used in supernatural horror.


I really like the home made production company in this film as the use of the eye is very effective.  I like how it is an actual filmed piece as it looks more professional and the still at the end is edited well and is individual
from other companies.


I really like this group's production company as it looks professional but still different.  It is only a still frame but some editing has been used which makes it interesting.  I do not think it would be appropriate for our genre in specific but maybe for a comedy or rom-com.

Sunday, 8 December 2013

Low-Lighting Practical

Low-Lighting Practical

The main convention for lighting techniques used in supernatural horror films is low-lighting.  This is used to help create a creepy atmosphere.  Low-lighting can be used to cast shadows over objects and people, facial features are sometimes extenuated using low-lighting from an angle.  The fear of the unknown is used in the majority of supernatural horror, so the dark is used as an easy and effective way of scaring the audience.  Low-lighting from candle light or a single lamp light highlights specific features out of the dark and adds to the scary atmosphere. 


 Candle light is also a reference to religion as most Christian churches use candles as part of their services, so as a main part of our opening is religion based I thought I would experiment with some candle lighting for mise en scene and lighting effectiveness.


I think that the candle look quite effective but would be better with a lot more candles to create a creepier aura.  The large candles were more effective than the tall thin ones as the light looked better but the thin ones were more genre appropriate as they relate to old style candle light.